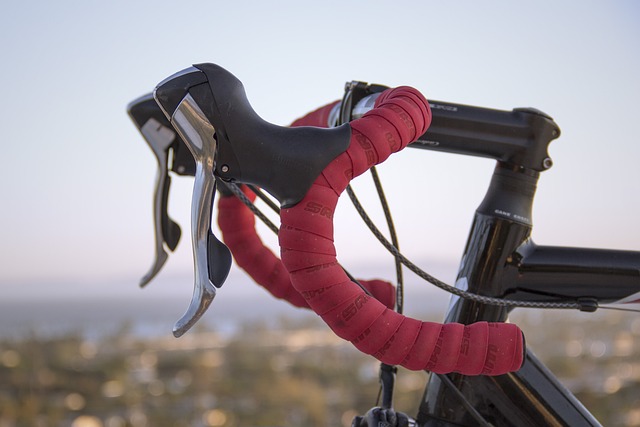
Here’s a guide with tips on how to replace your road bike handle bar tape. It’s an inexpensive and easy maintenance tasks that really benefits your riding.
Your road bike is more than just a set of wheels; it’s an extension of your passion for cycling, delivering a sense of freedom and thrill with every ride. Amidst all the components that make your bike a smooth operator, one often overlooked hero is the handlebar tape. This unassuming wrap plays a crucial role in your cycling experience, providing comfort, grip, and even a touch of personal style. In this blog post, we’ll unravel the importance of handlebar tape for road bikes, guide you on when and how to replace it, explore the different types available, and address the common question: How hard is it to replace?
Comfort and Grip:
Handlebar tape is not just about aesthetics; it’s a key player in your comfort on the road. The tape provides a cushioned layer between your hands and the handlebars, absorbing vibrations and minimizing fatigue on long rides. Additionally, it offers a grippy surface, ensuring a secure hold even in wet or sweaty conditions.
Style Statement:
Beyond its functional aspects, handlebar tape is an opportunity to express your personal style. With a myriad of colors, textures, and patterns available, you can customize your bike’s look to match your personality or complement its overall aesthetic.

When to Replace Handlebar Tape
Over time, handlebar tape can wear out due to continuous use, exposure to the elements, and the natural oils from your hands. Here are signs indicating it’s time for a change:
- Visible Wear and Tear:
- Look for signs of fraying, cracks, or noticeable wear on the tape’s surface.
- Loss of Grip:
- If the tape feels slippery or loses its grip, especially in wet conditions, it’s a clear indicator that it needs replacement.
- Comfort Issues:
- If you notice discomfort, numbness, or increased vibration during rides, it could be a result of worn-out handlebar tape.
How to Replace Handlebar Tape
Tools and Materials:
Before diving into the replacement process, gather the following tools and materials:
- New handlebar tape
- Scissors
- Electrical tape or adhesive strips
- Handlebar plugs
Step-by-Step Replacement:
- Remove Old Tape:
- Start at one end of the handlebar and unwind the old tape. If there’s adhesive residue, clean it off with rubbing alcohol.
- Wrap New Tape:
- Begin wrapping the new tape from the end of the handlebar, overlapping each turn by about half the width of the tape. Ensure a consistent tension as you wrap.
- Secure the End:
- Use electrical tape or adhesive strips to secure the end of the tape. Wrap it tightly to prevent unraveling.
- Around the Brake Levers:
- When you reach the brake levers, create a neat and secure wrap around them, ensuring a comfortable grip.
- Finish at the Bar End:
- Continue wrapping until you reach the bar end. Secure the end of the tape with electrical tape or by inserting the handlebar plugs.
- Repeat for the Other Side:
- Repeat the process for the other side, ensuring symmetry in the wrap.
Exploring Types of Handlebar Tape
Cork Tape:
Cork handlebar tape is popular for its excellent shock-absorbing properties and comfortable feel. It provides a traditional and timeless look.
Foam Tape:
Foam tape is known for its lightweight and cushioning characteristics. It often comes in various thickness options, allowing riders to choose the level of padding they prefer.
Gel Tape:
Gel-infused handlebar tape offers additional comfort and vibration dampening. It’s a great choice for riders seeking extra support during long rides. Another choice are gel inserts that go under your bar tape. Here’s an option I’ve recently installed on my road bike and so far they’re working out great!
Leather Tape:
For a classic and luxurious feel, leather handlebar tape is a top choice. It may require more maintenance, but the aesthetic and durability are often worth the extra care.
Is Handlebar Tape Replacement Hard?

The process of may seem daunting at first, but with a bit of patience and attention to detail, it becomes a manageable task for most riders. Following a step-by-step guide, like the one provided above, can help demystify the process.
Tips for Easy Replacement:
- Take Your Time:
- Rushing through the process can lead to uneven wrapping and discomfort. Take your time to ensure a neat and even wrap.
- Overlap Consistently:
- Maintain a consistent overlap to create a uniform appearance and comfortable grip.
- Secure the Ends:
- Properly securing the ends of the tape is crucial to prevent unwinding during rides.
- Experiment with Angles:
- Play around with different wrapping angles to find the style and comfort level that suits you best.
In conclusion, handlebar tape is not just a finishing touch on your road bike; it’s a performance enhancer and a style statement. Regularly replacing worn-out tape ensures a comfortable and enjoyable cycling experience. With a variety of tape options available, riders can customize their bikes to reflect both their personality and functional preferences. So, when your handlebar tape begins to show signs of wear, don’t hesitate to embark on this DIY adventure. Your hands, and your bike, will thank you for the upgrade! 🚴♂️✨

